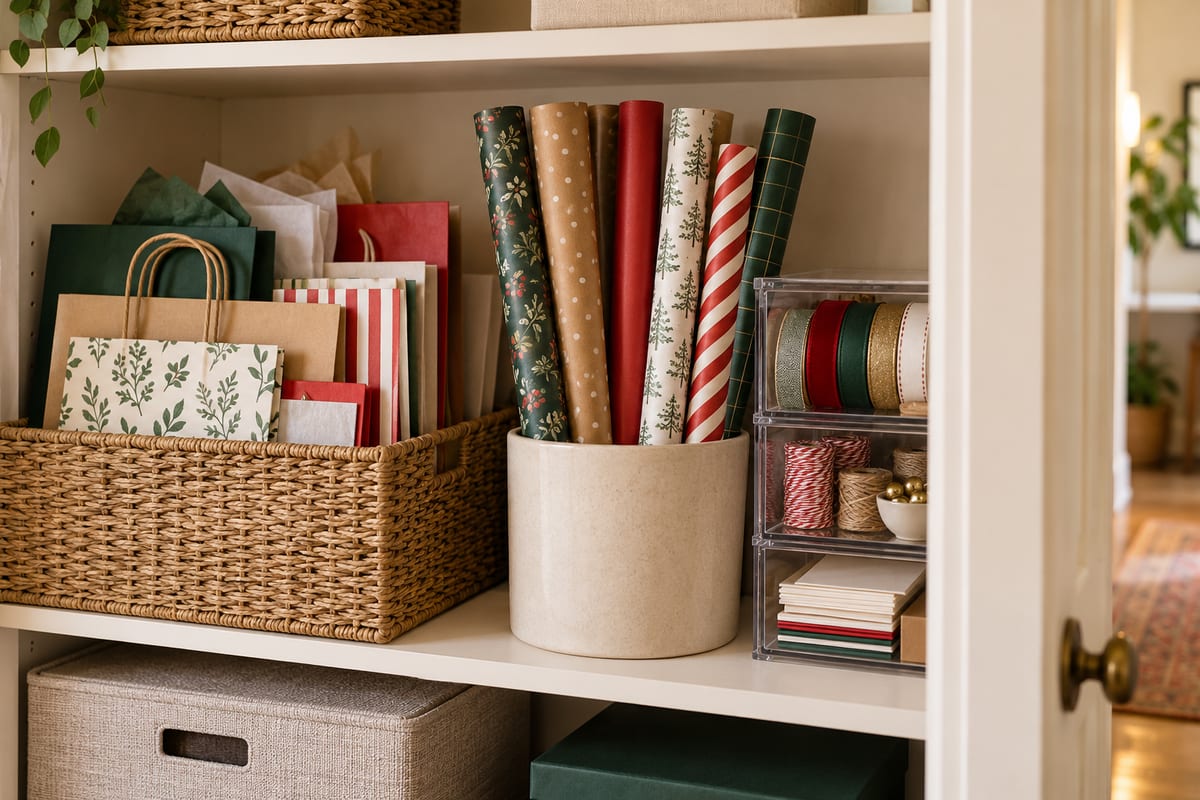
Gift bags and wrapping paper often end up in several closets and drawers. When you need them, it is hard to tell what is still usable or whether you already have a bag for the occasion. Giving these supplies one home makes them easier to find and helps you use what you own.
Gather everything before choosing storage
Bring the rolls, gift bags, tissue paper, ribbon, cards, and tape together. Set aside pieces that are torn or too small to use. Flatten bags that can be stored that way, and keep cards or tags in a folder so they do not disappear between rolls.
Store rolls upright
A tall basket, container, or open corner of a closet can hold wrapping paper upright. Keep the rolls visible and easy to lift out. If they are stored under a bed or on a high shelf, make sure the container is still easy for you to reach.
Keep smaller supplies together
Use a small box or divided tray for ribbon, tape, scissors, and tags. Put gift bags beside the rolls, sorted loosely by size if that helps. Leave some empty room so new supplies do not force you to rearrange everything.
Check the collection before shopping
When you need to wrap something, look through the container first. A bag or leftover sheet may already suit the gift. Afterward, return reusable pieces to the same spot and add only what is genuinely missing.
Put together a cleaning caddy that suits your home
Choose cleaning supplies by the surfaces you have, keep product directions available, and store everything appropriately after use.
By Fresh Living Insight ·
A cleaning caddy is useful when it carries the supplies for the job you are about to do. It becomes awkward when it holds every partly used bottle in the house.
Start with one task, such as wiping a bathroom counter or cleaning a particular floor. Check the surface-care instructions before choosing what goes in the container.
List the surfaces before the products
Different finishes can need different care. A product suitable for one countertop may be unsuitable for another. Check both the surface manufacturer’s guidance and the cleaner’s label, rather than treating a general product description as permission to use it everywhere.
Write down which product you use for each recurring task. If you do not know what a surface is made from, check the paperwork or ask the relevant supplier before trying an unfamiliar method.
The CDC’s home-cleaning guidance recommends using a product suitable for the surface and following its label. It also warns against mixing products or chemicals. Keep those instructions with the product instead of relying on a remembered tip.
Carry a manageable amount
Choose a container you can lift comfortably with the supplies inside. Check that the handle stays secure when you lift the loaded caddy. Check any weight and care instructions supplied with the caddy.
Add the tools the chosen task needs. A cloth, a suitable brush, or another surface-approved tool may be enough. Keep tools used in different areas separate where appropriate, and follow their care instructions after use.
If you clean several rooms in one session, consider whether a second trip is easier than carrying a crowded container. Bottles should stay upright and should not have to be wedged against one another to fit.
Keep the labels readable
Retain products in their original labeled containers. Do not decant cleaners into drink bottles or unmarked decorative containers. Read directions for application, dilution where required, ventilation, protective equipment, and storage before you begin.
A caddy does not make incompatible products suitable for storage together. Follow the storage requirements on each label, and choose a different arrangement when a product needs it. Keep products secured away from children and pets.
Look at partly used supplies before buying another bottle. If a product is damaged, unidentified, or no longer usable, follow the label and appropriate local disposal guidance. Do not combine leftover products to clear space.
Give used tools somewhere to go
After the task, follow the cleaning and drying instructions for reusable tools. A wet cloth pushed back into a crowded container is easy to forget. Keep used tools apart from supplies that are ready for the next session.
Wipe or clean the caddy itself according to its material and care directions. Check that it is ready for storage, then return it to an appropriate secure location. Leaving a loaded caddy beside the next room can make its contents accessible to someone who should not have access.
On the next cleaning day, note anything you carried without using. Leave it in its proper storage place next time. If an essential tool was missing, add it to the task list before changing the whole setup.
Give bags, keys, and everyday shoes a clear place while keeping the route through a small entrance usable.
By Fresh Living Insight ·
One person comes home with a tote bag, another drops a backpack, and the shoes gradually spread across the doorway. A small entryway has to handle several people’s routines in very little space.
Watch an ordinary arrival before adding storage. Notice where people stop, what they need a hand free for, and what stays there after they have gone into the rest of the house.
Keep the route through the entrance clear
Open the door fully and check the path people actually use. Account for anyone carrying groceries, managing a stroller, or using a mobility aid. A bench or shoe rack that narrows that route may create more difficulty than it solves.
Try marking the proposed footprint of a storage piece on the floor before ordering it. Check the space again with the door open and the items you expect to store in place. Include handles, projecting edges, and doors on the storage itself.
Choose another location if the entrance cannot hold a piece comfortably. A nearby cupboard may be a better home for occasional shoes than a rack squeezed into the doorway.
Assign space to current essentials
Keep the items each person uses regularly near the entrance. Seasonal equipment and spare bags can live elsewhere when they are not needed. Agree on what counts as current, especially if one person rotates shoes or coats frequently.
A small tray can hold keys and another frequently carried item. Check whether valuables are visible or accessible from outside before choosing its position. Private mail also needs a suitable place away from visitors’ view.
For bags, try a separate place for each person. Use existing furniture or storage first. If you plan to install hooks or shelves, check the wall, fixings, load limits, and any tenancy requirements. Get appropriate help when the installation is beyond your skills.
Give outgoing items a temporary spot
Returns and things to take to work often need to wait near the door. Choose a contained spot that stays out of the walking route. Add a note when the item needs to leave on a particular day.
Separate those items from incoming mail. Otherwise, a return can disappear under letters before anyone carries it out. A small bag or folder marked for the next trip may be enough; there is no need to create a permanent bin for every type of errand.
Make putting things away straightforward
Try the setup with everyone who uses the entrance. If a basket has a lid that makes returning shoes awkward, check whether a different container or location would work better. Keep children’s belongings within suitable reach while storing unsafe items securely.
Do not assume a heavy storage piece is stable simply because it sits in a corner. The CPSC’s Anchor It guidance advises following manufacturer instructions to secure furniture and televisions properly.
After several days, remove anything that has been stranded in the entrance without a reason. Ask whose it is and where it belongs. Adjust the crowded spot, then leave the rest of the arrangement alone long enough to find out whether it works.
Organize a kitchen drawer around the things you reach for
Sort one kitchen drawer by everyday use, check what really fits, and try the arrangement before buying an organizer.
By Fresh Living Insight ·
A kitchen drawer can look tidy and still be awkward to use. The tool you need is buried under three others, while something you use twice a year takes the easiest spot to reach. Start by noticing what you take out when you cook an ordinary meal.
Choose one drawer you can finish before the kitchen is needed again. Keep a small space nearby for the contents, and leave the rest of the cabinets for another session.
Find out what the drawer is doing
Empty the drawer carefully, checking for sharp or breakable items before reaching into a pile. Put knives and other sharp tools in storage intended for them, following the manufacturer’s directions. A loose drawer divider is not a substitute for suitable blade protection.
Group the remaining contents by how you use them. Serving tools might belong together; small measuring tools may need their own space. Set aside anything that belongs somewhere else and return it there before it joins another temporary pile.
If you share the kitchen, ask what the other person reaches for. A drawer arranged around one person’s cooking routine can be inconvenient for everyone else.
Give everyday tools the easiest positions
Start with the items you use frequently. Lay them where you can take them out without moving a stack of unrelated tools. Give less-used pieces the remaining space, or find a different location if they are crowding the drawer.
Consider duplicates individually. Two spatulas may be useful when one is in the dishwasher. Several nearly identical gadgets might be leftovers from different sets. Keep the pieces that have a job in your kitchen, and decide what to do with the others.
A short trial is useful when you are unsure about an item. Keep it in a clearly identified review box in an appropriate place, with a date to revisit it. Do not let the box become a second drawer that nobody remembers to check.
Measure before you add dividers
Measure the usable inside width, depth, and height, including any obstruction near the drawer opening. Check that taller tools clear the cabinet when the drawer closes. External cabinet dimensions do not tell you what an insert will hold.
Try the layout with a suitable tray you already own. Leave enough space to lift an item out with one hand. A compartment that fits an object tightly may be frustrating when you are putting dishes away.
Before buying a divider, compare its internal compartments with the tools you want to store. Check the material and care instructions too, particularly if the insert will be used near food preparation.
Use the drawer for a few normal meals
Watch for the places where you hesitate. If the measuring spoons keep landing beside the tray, their assigned compartment may be too small or too far back. Move that one group and see whether the new position works.
A simple label can help people return things, but check that everyone understands the category first. “Baking” may mean measuring tools to one person and cake decorations to another.
At the next wash-up, put the clean tools back in the new arrangement. Notice any tools you have to move before you can reach another one. Adjust the compartment that is getting in the way.